Quickstart
Get up and running with Quill in less than a minute
1. Create a read-only user
To create a read-only user in PostgreSQL, do the following:
Create a new user
-- Replace 'password' with a strong password.
CREATE USER quill_read_only WITH PASSWORD 'password';
Grant CONNECT privileges
-- Allows the user to connect to the database.
GRANT CONNECT ON DATABASE your_database TO quill_read_only;
Grant USAGE on the schema
-- Allows the user to access the objects within the schema.
GRANT USAGE ON SCHEMA your_schema TO quill_read_only;
Grant SELECT privileges on the schema
-- Allows the user to read data from the tables.
GRANT SELECT ON ALL TABLES IN SCHEMA your_schema TO quill_read_only;
The connection string for the read-only user we just created will be something like: postgresql://quill_read_only:password@db.example.com:5432/your_database.
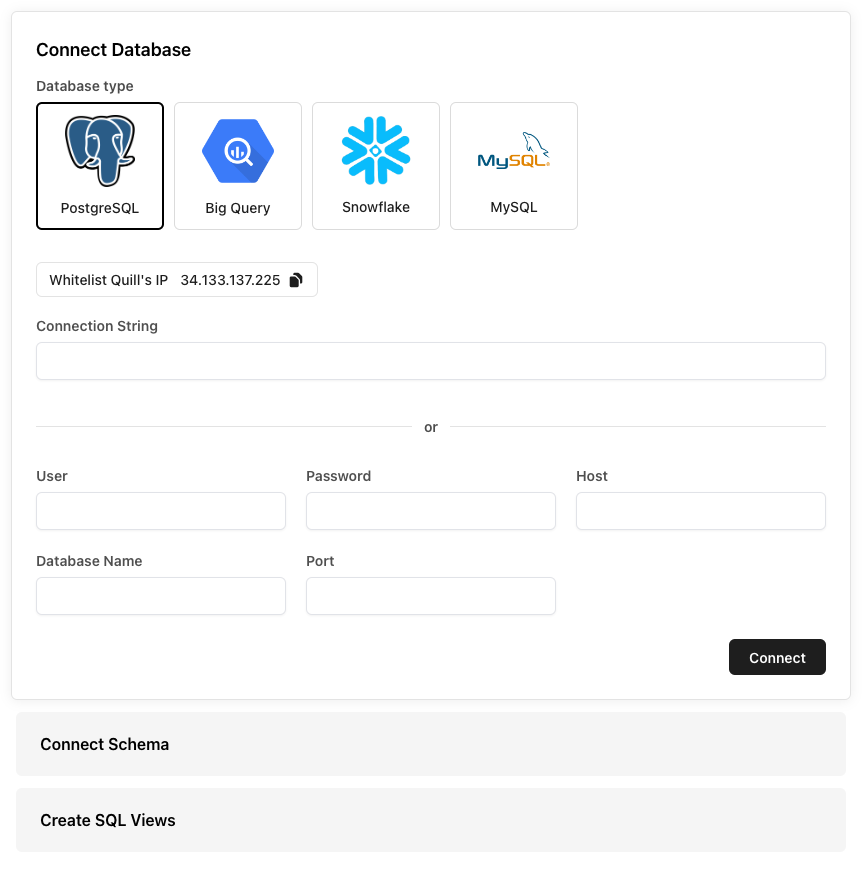
2. Connect your database
Go to https://app.quill.co/onboard and enter the read-only database connection string that we created in the last step.
If you’re using our fully-managed Quill instance, make sure to add the Quill
server to your database IP whitelist, if you have one. Requests from Quill
will always come from 34.133.137.225.
For more information about data and access control, you can read our self-hosting guide here.
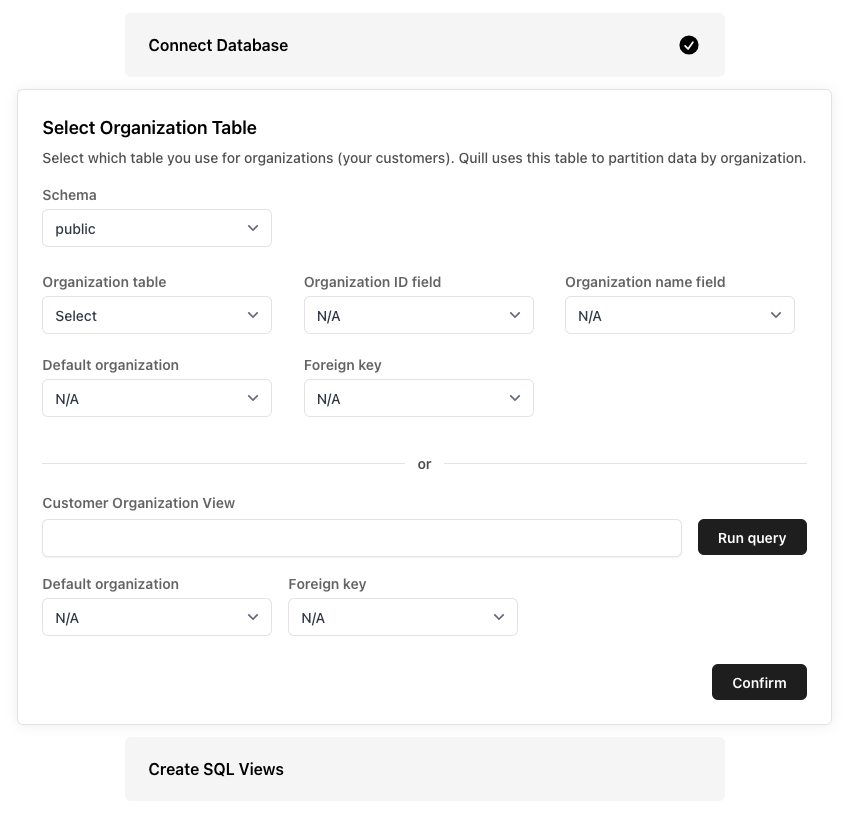
3. Connect your schema
The Quill platform provides powerful filtering and reporting tools to help you get the insights you want, faster. Since Quill provides organization-based filtering out-of-the-box, simply let us know which table to use and Quill will automatically partition your data by organization.
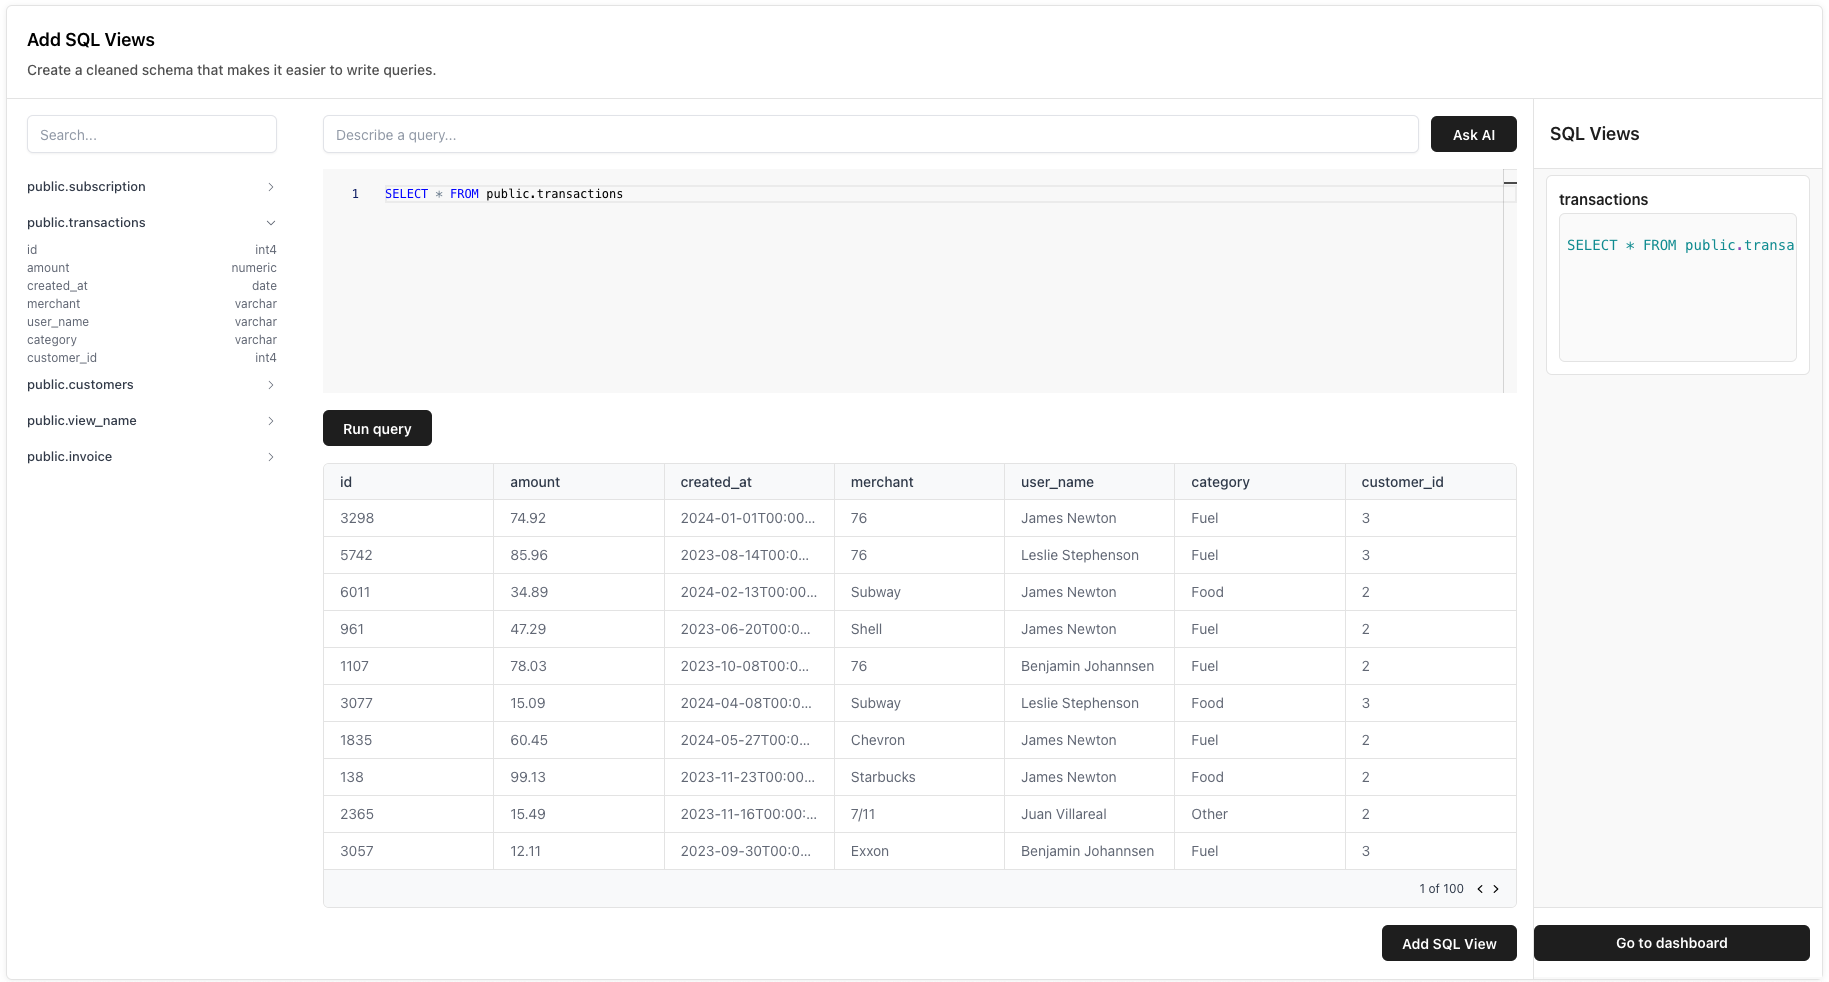
4. Add SQL Views
Create a cleaned schema that makes it easier to write queries and reports. The views you create here will be used to create charts and tables later on. Don’t worry, you can always create and edit these views later.
Next Steps
Once you have connected your database, you’re ready to create your first dashboard! Check out our guides on how to create your first dashboard below.
Create a dashboard
Build your first dashboard with Quill in less than a minute.